Showing posts with label tips and tricks. Show all posts

Saturday, July 28, 2018

How To Select the Right Paint and Color For Your Home

Find all you need to know about selecting the right paint and color for your home.
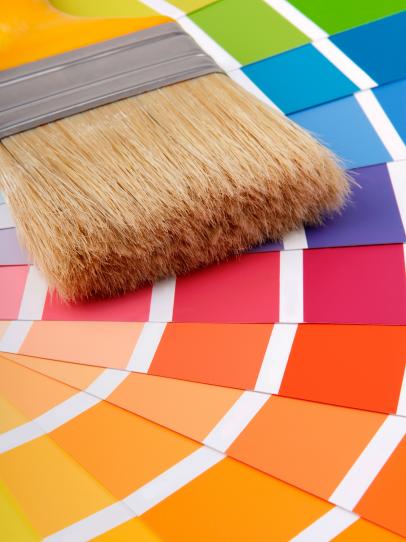

Cheap way to give an old room a breath of fresh air or to make your house more sellable if you are putting it on the market. Find out all you have ever wanted to know about selecting paint. 

Which paint should you choose?

Paint comes in a variety of sheens as well as in either oil or latex. Latex paint is the most commonly and preferred paint type to use because of its ease of clean up and long lasting durability. It also tends to be more fade resistant and breathes better than oil, resulting in less blistering of the paint. I recommend using a latex paint for most of your walls and household uses. However, oil based paint is great for priming real wood moldings and trim as it tends to seal stains and knots from the wood better than a latex paint wood. It does take longer to dry than a latex paint though, so plan for more drying time. I personally use an oil based shellac primer on my trim and then opt for a latex paint as the top coat. There are a variety of brands on the market, but my top preference is Behr paint.

Which sheen should I select?

The glossier the paint, the easier it is to clean up. If you have small children and the room you are painting has high traffic, like in a playroom, or tends to get grease on the wall such as in a kitchen, opt for high gloss sheen as you can easily wipe the wall down with a damp sponge. This will however make blemishes and imperfections in your wall more apparent and in rooms such as living rooms, could give off an unpleasant shine. High gloss is also great for trim and will give the trim a nice finished look, complementing the flatter sheen of your walls.
Semi-gloss would also be a good choice for kitchens and baths as well as trim providing you with ease of wash-ability and less shine than the gloss. It is also slightly cheaper than the gloss finish and is a very common alternative. Satin sheens have a satiny smooth finish to them and could also be used in kitchens, baths and hallways. This may be a good choice if you really want some gloss and paint that can clean easily without the shine of a gloss.
If you have walls with lots of imperfections, select a flat or matte paint. You can usually get away with one coat of paint with a flat. The downside to this paint is that it does not stand up well to a good cleaning and does tend to show dirt more so choose this for rooms that will not get lots of fingerprints and dirt on them. Probably the most popular sheen is eggshell, which hides imperfections like a flat does but is easier to wash, so more durable and smoother to the touch. I recommend this for most rooms as it seems to have the best of both the flat and glossy worlds.

Which color should I choose?

If you are in the process of selling your house, I recommend selecting a white or off-white color as the choice for walls. This will allow the buyer to easily cover the wall with their choice of color and will give your rooms a brighter and clean appearance. However, you should take full advantage of the hundreds of paint selections and brochures at your local paint store as well as talk to a salesperson about the various color schemes for the look you want. You can change the feel of any room in your house with a little planning and some color, varying the shades for a certain look or feel.
A good rule of thumb is to remember the color wheel. We all learned about the primary colors in school - red, yellow and blue. These are on the color wheel at 12:00, 4:00 and 8:00 respectively. Combining any of these will give you a secondary color (i.e. purple, orange). Colors near each other on the color wheel such as blue and purple are analogous to each other and will allow one color to stand out more. Colors opposite each other on the color wheel such as green and red are complementary to one another and will nicely play off each other. Staying within the same shade of color (i.e. greens) will give you a subtle and soothing look. Painting with cool colors such as blues, greens and purples makes small rooms appear larger and more airy while colors such as reds, yellows and oranges will give a room a more vibrant appearance. You can vary the warmth even with a red or yellow by choosing muted shades of those colors such as pink, peach or a buttery yellow. Warm colors have cool ones as their complementary colors while cool colors have warm complements. Shades are either pure or vibrant, muted (which are less intense than their vibrant counterparts) or shaded (the darker colors in the same color scheme). 

I want a subtle and soothing look:

You can choose to stay within the same shade and use a monochromatic approach such as select a variety of shades of blue for subtle color that tends to be soothing. This tends to look good in a bathroom or a bedroom if you want the feeling of calmness. Just choose your favorite color and overlap the shades. For example, select a darker color for the wall and then another in the same color scheme but different shade and slightly lighter for the trim. Your curtains, towels or bedding as well as accessories such as candles can be varying shades within the same scheme. You can also layer the colors by selecting a lighter green as the basecoat and then do a faux paint with a darker green overlay.
Light color choices such as blues, lavenders, pinks and soft yellows are great choices for a romantic feeling of tranquility and restfulness in a room. If you are looking for a calm ambience in your bedroom, choose lighter shades of either cool or warm colors. Use different textures in your bedding and accessories to make the room even more appealing. Don’t hold to the old rule of one shade and one texture. You will be pleasantly surprised at the effects just changing textures and colors can have on a room.
 Colors such as sage can turn a kitchen quickly into one of comfort and shades of buttery yellows in a kitchen will lend to that feeling baked goodies brings. Shades of powdery blue also tend to yield feelings of tranquility.

I want an elegant look:

Neutral colors offer elegance and flexibility within a room. Neutral colors are no longer simply white or beige. You can turn a simple living room into one of elegance by selecting varying shades of neutral colors such as almond walls with red toned browns on the trim. You can also add splashes of color throughout the room with a color throw, pillow or vase carefully placed to offset the subtle neutral tones in the room. Again, don’t be afraid to add texture to your accessories. Neutral colors allow you more flexibility in quickly changing the feel to a room. You can easily change the feel of a neutral room by adding different colored accessories or painting the trim a new color. You can choose either lighter or deeper neutral colors and vary the look of the room. Remember, the lighter color you go, the more spacious the room will appear. Varying shades of rust, mahogany or garnet will offer instant elegance and a feeling of earthiness and richness.

 I want a vibrant look:

If you want a room with pizzazz, choose vibrant colors and their respective shades such as oranges and gold, reds and dark purples. You can complement these colors by selecting a two next to each other such as gold and orange and one from the opposite side of the color wheel such as purple. You can also select black and red for a real stand out contrast and look that is reminiscent of an Oriental look. Choose two colors next to each other on the color wheel for a visual contrast as one will stand out from the other.

Ceilings:

You can lower a high ceiling visually by painting it a darker shade than the walls. By the same token, you can expand a room by selecting a lighter color for your ceiling than the walls. Don’t be afraid to add a tint of color to your ceiling paint for a tied in and subtle look. One way to go if you are afraid of too much color in your ceiling is to paint the ceiling, door trim and floor moldings the same shade such as a creamy ivory. This will add a touch of elegance and a nice transition throughout your room.

Creating Focal Points:

Think focal point when you are painting a room. You can quickly change the look of any room by adding contrasting colors to the walls and trim or by adding a darker color to one particular wall. You can make a large room look smaller by painting one wall a darker shade. You can also visually expand a room by painting the walls a darker color and the trim a lighter shade within the same color scheme, especially if you have a room with detailed trim on the walls. This easy change will make the room pop out more visually and add definite appeal. If you have a room with molding halfway between the ceiling and floor, use two different shades of the same color for a wonderful visual contrast. Highlight any interesting aspect in your rooms with a darker, complementary shade to the one you have chosen for your walls. Visible stairways, especially those in the middle of the room look incredible when painted a darker shade than the walls and gives you a wonderful focal point.
You do not have to spend a lot of money on an interior designer to redo the look of your house. With a little paint and a lot of imagination, you can easily change the look and feel of a room. Look for highlights of your rooms and think of ways to make them stand out. Think of how you want to feel when you are inside that room. Do you want to feel romantic and calm? Choose a light warm or cool shade. Or do you want to feel homey and comforted? Select buttery yellows such as for your kitchen. Do you want a feel of calmness and balance? Select shades of green that are light or moss or sage colored. Do you want to feel energized and express your vibrant personality? Choose vibrant shades. Do you want an air of elegance and serenity to a room? Select neutral shades or cool light greens. The point is, you can quickly feel the way you want with a can of paint or two, a paint brush and a little imagination. 

Content provided by Associated Content from Yahoo!

Friday, July 13, 2012

Inexpensive Investment Property.

While the Fed is keeping interest rates historically low,opportunities abound for the real estate investor. Housing is more affordable  than ever and the prices seem to have only one way to go-up.Bank loan rates are affordable and property prices are low,which is the perfect storm for a savvy investor. Like investing in stocks or bonds,research is critical. You need to decide first if you want to manage your real estate investment , pay a management firm or fix up and sell your real estate quickly.

If you are first-time investor, it is wise to stay with residential real estate and avoid competing with big time commercial property investors.Just plan to start small and work your way up- a first time huge investment can drag you down quickly if you are not able to add additional financing after the initial round.Don't knock yourself out trying to pay off the property upfront, because now you can get an attractive interest rate allowing you to save part of your investment funds for those unexpected costs that always rear their ugly head when you least expect it.Plus,as inflation rises your investment will be a great hedge against rising prices.

Take the time to scout the area.Look for schools nearby shopping centers, grocery stores , quiet neighborhoods. Then look for the bad qualities such as people loitering on corners, trash on the street, disabled autos, burglar bars on most properties and vacant homes or empty buildings.The qualities don't offset each other-if you see any of the bad qualities, drive away quickly.

Lastly, don't try to do everything yourself. Find 5 reputable agents that know that area you want to invest in then meet with each of them,possibly taking a tour of the area, while evaluating their expertise . Tell them your bottom line and don't be convinced otherwise.If anyone tries to tell you that you can afford more than your set budget or that a more expensive deal is too good to pass up, then they are not looking out for your best interests.When you find the right person, you'll know and this just might start a long-term relationship that will make you a truly savvy investor finding the best bargains on the market.


___________________________________________________________

Bio :
Paul Toller has worked in the real estate market for over 20 years, as an investor,real estate consultant and real estate property management software expert.Paul currently works as a consultant at http://www.TenantFile.com , a firm that specializes in property management software.

Sunday, December 18, 2011

Remodeling Tips for Studio Apartment

Studio apartment usually combines the living, sleeping, working and sometimes cooking areas. Planning the whole interior design carefully will make it spacious and stylish. Use receding or light color schemes in your studio apartment. The light color will reflect light and make the room seem bigger. White walls greatly contrast with bright red, blue, green and yellow accents in interior accessories. So choosing this basic color you can play with pops of bright shades in decor as well as use various prints.


It is also important to list the areas by priorities. If you need a big working area think where it will fit best in your studio apartment. Built-in beds and shelves can save much space. Folding and hide away beds and tables will also make your room appear more spacious leaving less obstacles.
The sleeping area can be hidden behind the curtains, dividers and shelves. Other areas such as kitchen and living area can be demarcated by differing decorating styles. Using different materials in each area is also a good idea to divide and demarcate each area. For instance, adding wood to the kitchen can make it more cozy but then avoid using same wood in the rest of the interior.
Use mirrors and multipurpose furniture to make the apartment look as spacious as possible. Get rid of all unnecessary things and interior accessories as they may clutter all the free space. Try and keep your studio apartment always neat, otherwise, it will look cluttered, which is unflattering.

Source :  http://www.interiorholic.com/home-designs/small-apartments/remodeling-tips-for-studio-apartment/

Saturday, December 17, 2011

Tips for Remodel Demolition

Tips for Remodel Demolition

Ready to tear out old bathroom vanities or hammer down a wall? Before hacking away, take a look at the following tips. Applying them can help prevent a delay in your house plans

1.Safety First! Make sure your clothing is appropriate before demolishing anything. A long sleeve shirt, blue jeans, thick gloves, goggles, steel-toed boots and even a hard hat are ideal gear for demolition. Even if you’re tearing out something simple, protective gear is essential. An unexpected visit to the emergency room could certainly delay your plans.

2.Turn Off All Power and Water Lines This tip also pertains to safety. Demolishing anything that contains wiring could be harmful, so make sure the right breaker switch has been turned off. On the same note, you want to make sure to turn off the water supply. This will prevent flooding and possible injury.

3.Detach Detach items that are not freestanding. For example, if you’re removing a toilet, use a utility knife to remove the seal from around the bottom of the toilet. Likewise, if you’re removing cabinet or counters, you’ll need to remove caulk that seals it to the floor or wall. If you’re tearing down a wall, verify that it’s not a support wall and that you won’t destroy unexpected wiring or the surrounding wall/ceiling.
These are just a few beginner pointers. Have fun with your demolition project and be safe!

Lisa keeps herself up-to-date with Austin real estate . She loves design and DIY projects.

Tuesday, June 7, 2011

Power Tools Can Save You Money

Owning DIY power tools can save you having to call out a handyman to fix a small problem for you meaning, you can save yourself a considerable amount of money by investing in them.

You don’t need every single power tool as, all you need is a few good tools and if you go down to your local DIY store or online DIY store you will see that there are numerous DIY tools with different combo kits to suit every project which range from cordless drills and jigsaws to mitre saws and screw guns. These combo kits have been designed to fit many different trades and industries.

Owning high quality power tools enables you to produce high quality projects. Hence, many DIY users like to have a Bosch drill or some form of Bosch tool in their DIY collection due to the company being renowned for its quality of power tools and with the cost of tools coming down with far more competition from other renowned power tool companies, the consumer has a lot more choice and can get a fantastic combo kit for an affordable price. The most popular tools for diy projects seem to be driver drills, grinders and jigsaws as these tools facilitate you to get stuck into most projects and assemble just about anything.

Additionally, power tools have considerably improved and innovated recently. For instance, their cordless power has consistently been on the rise due to battery technology receiving significant innovation resulting in an average charge of less than an hour to result in you being able to use the tool for the entire project without another recharge. Moreover, batteries have been become interchangeable so that two batteries from a combo kit can fit numerous tools, so that you can keep operating for hours at a time by just swapping the batteries and keep going whilst, you can leave the other to charge.

Moreover, the power of the cordless tools is also being improved beyond the scale of their corded rivals and due to constant innovation you should expect them to get even better in the future. As mentioned earlier lithium ion batteries can be charged intermittently and last for hours in numerous different tools.

Hence, investing in a few good power tools can save you money and get your project completed quicker than ever before!


by ;Nicholas from

Contentlobby.com

Saturday, April 16, 2011

KITCHEN GEOGRAPHY; CHANGING THE TERRAIN OF THE HEART OF THE HOME

Once relegated to the back of the house, the kitchen has in recent years come out of confinement. But the challenge in creating an open-faced kitchen - one that's part of a dining area, family room or so-called great room - is downplaying its utilitarian nature.
Beyond choosing appealing materials and colors, a key factor is combating excessive uniformity and rigidity by creating a lively interior landscape and skyline using cabinets and structural elements. Thinking in geographic terms can help a kitchen relate to the spaces around it and yet set it apart from them.

If you're remodeling an old kitchen or planning a kitchen addition or a new home, here are some strategies to keep in mind.

Build bridges, not walls. Islands and peninsulas are the kitchen's new walls. Because you can see over and around them, they connect the kitchen to an adjacent dining area, living room or family room and yet define the kitchen's borders. They also allow the cook to maintain visual and conversational contact with family members and guests in adjoining spaces.

Create a kitchen canopy. Even with an open floor plan, it's important to keep the kitchen from spilling over visually into other spaces. What islands and peninsulas do below, dropped soffits and shallow ceiling-mounted cabinets do above. They define the kitchen's borders in a subtle way without blocking views into or out of the kitchen.

A coffered or pitched ceiling can also distinguish the kitchen from neighboring rooms. Going for a high ceiling in the kitchen can boost the perception of spaciousness. Going low in a dining area imparts a sense of intimacy.

Cut back on cabinets. In a kitchen with just one or two walls, finding space for storage is problematic. But resist the impulse to cram in too many cabinets. Instead, design a storage-intensive walk-in pantry. Banish rarely used goods -- the picnicware, the punch bowl, the turkey roaster - to the basement, mudroom, or garage. Store the good china in a lighted china cabinet in the dining area.

Stagger the height, length and depth of wall cabinets. The idea here is to break up the horizontal lines at the top and bottom of a row of cabinets that can make a kitchen look rigid and static. Insert a plate rack or an open shelf unit between two long cabinets.

If you have ample work surfaces, put in a couple of extra-tall cabinets that sit on top of the counter. Using some cabinets that are deeper or shallower than the standard 12 inches can add more visual dimension to a kitchen.

Stagger the height of base cabinets and counters, too. Not all countertops have to be at the same height. Lower a cooktop by 4 to 6 inches and allow 15 to 18 inches of counter space at the same height on either side. In addition to providing some much-needed visual variety, a lowered cooktop can be more ergonomic, particularly for short cooks.

If you're a baker, consider putting in a baking center with a work surface at 30 or 32 inches rather than the standard 36. It's a more comfortable height for rolling out dough or using a hand-held mixer.

Vary cabinet door styles. There's no law that says all cabinets have to be identical. Use solid doors on some cabinets and glass doors on others. Or outfit a couple of doors with wire mesh, lattice or even shirred fabric. Use one style of door for perimeter cabinets and another for the island.

Choose more than one cabinet paint color, wood stain or decorative finish. For example, use barn-red cabinets for the island and natural maple everywhere else. Choose light wood stains for some, dark for others. For just a little rusticity, choose a "distressed" or antiqued finish for just one or two cabinets. For continuity, choose cabinet styles and finishes compatible with built-ins and furnishings in adjacent spaces.

Alternate countertop and backsplash materials. Reserve granite for an island and use a neutral solid surface material for all the other countertops. Top a baking counter with a slab of marble. Use ceramic tile or laminate in the wet areas and top a peninsula with maple butcher block. As for backsplashes, you might want to use stainless steel behind a range but ceramic tile elsewhere.

Hiding appliances is a matter of personal taste. Some people don't mind seeing the refrigerator from the family room. For those who do, cabinet-matching panels can camouflage the kitchen's largest machine. Panels for dishwashers, trash compactors, and icemakers are also available.

Add a raised ledge or breakfast bar to an island or peninsula to hide the cooktop. If you can't position tall double ovens so that they're out of view of neighboring spaces, think about installing a second under-the-counter oven in an island or peninsula.

Ranges are harder to hide, especially large, commercial-style ranges and the bulky exhaust hoods that come with them. That's one reason many consumers are choosing stainless steel models. Stainless steel is a kind of go-with-anything, neutral material that picks up the colors and tones of cabinets and flooring and seems to quietly blend into a kitchen's background.

An opposite strategy is to make a range the kitchen equivalent of a focal-point fireplace by building an alcove around it.

by:MICHAEL WALSH
http://www.absoluteremodeling.com/KitchenTips.html

Friday, April 15, 2011

All You Really Need To Know About Kitchen Remodeling!

All you really need to know about kitchen remodeling, you will find here! Many homeowners engage in renovating the kitchen area annually. There are many different reasons for this. One of the main reasons is that it actually increases the overall value of the home as a whole. In addition to this, it has been found that the kitchen is one of the main rooms in the home with the highest amount of traffic. If you are looking to take on a home remodeling project, but are unsure of where to start, why not start with the kitchen? Here, you will learn several different things, such as:

• You will be provided the basics regarding kitchen design. There are several different elements that go into this type of design. You must decide what it is that you want to accomplish, and then work to prepare yourself for the project. This means acquiring the proper tools for the position, as well as the materials that will be needed in order to complete the design project. Here, you will learn important information regarding all of these elements to the design projects that can be completed in this room of the home.

• Are you in the market for a kitchen fix such as making more room? Installing updated appliances? There are many kitchen fixes that can be performed in this room. Throughout the pages of informative guides and articles on this website, you will learn about many of them!

• Are you looking to make kitchen renovations? If so, you will find a wide range of ideas in the area of renovations throughout this website. You can information on how to install new cabinets, put in that new sink, how to revamp the walls and freshen them up, and even how to install new flooring!

• Many homeowners find that they need basic kitchen help. This is not an unusual occurrence. There are many different things that can occur in the kitchen that need to be dealt with. For example, the kitchen sink may clog up. The faucets may stop working like they should. A leak may develop in the water pipes that run to the sink. There are several different things that may happen in the kitchen area that you may find yourself stumped over. Throughout the pages that we have here, you will learn all about how to tend to the most common issues faced by homeowners.

• In many cases, it may be necessary to hire a professional to assist you in tasks that are necessary when it comes to the kitchen area. Here, you will be able to learn when it may be necessary to hire outside help, and how to find the right professional for the job that you need completed.

If you are looking to add value to your home, or enhance the appearance of your home, the kitchen is a great place to start. There are several different projects that can be performed in this particular room, including but not limited to:

• Repairing water damaged areas around the sink and pipe areas in the room

• Removing and replacing the flooring in the room

• Removing old appliances and replacing them with new appliances

• Refinishing appliances to provide a fresh, new look

• Repairing and/or replacing the walls in the room

• Adding new lighting, or making old lighting a bit more modern

• Adding decorative items to the room

• Improving ventilation in the room

As you can see, there are many different kitchen remodeling projects that you can pursue. We have made it easy for you by researching these projects and creating information that you can really use at this website!

Thank you for great info : http://www.kitchenremodelingfixes.com/

Thursday, April 14, 2011

Basic Kitchen Remodeling Planning

There are some basic steps you need to take when you decide to remodel your kitchen. Here I will present to you a quick overview of what you need to do when remodeling your kitchen; you will find more details throughout this website.

The first step is, of course, deciding on your goals for the kitchen. What do you want your remodel to accomplish for you?

You'll want to do some research even at this early stage. What kinds of materials will you want to use for countertops? Granite is hugely popular, as is Silestone, which is made from natural quartz and comes in a huge range of colors. What kind of wood do you want for your cabinets, and how light or dark should they be? What about flooring? Then you have to consider which appliances will need to be replaced, how you want the room painted, lighting and any major changes in the layout of your kitchen.

Of course, there's one more very important goal for you to consider - your budget! How much will you want to spend? Will you want to get a home equity loan for your remodel or have you saved money up for this project?

Now you will want to start sketching out your ideas. You don't need to be a great artist; just get some graph paper, pen or pencil and a ruler and start mapping things out. Of course, if you are more technologically inclined, you can do this on the computer as well if you have the right software.

Generally speaking, you will want your refrigerator, stove and sink to form a triangle in your kitchen. Include plenty of walking space and room for eating. Will you want an island in your kitchen or will that just be in the way? How will the table fit? You'll also want to look at where outlets are, keeping in mind where you plan on placing your appliances. You may have to move outlets or plumbing if you're rearranging your layout. Don't forget to consider installing extra outlets.

Make sure your sketches include dimensions. Whether you're doing it yourself or hiring professionals, accurate dimensions will help you plan well and give the best feel a paper sketch can give for how your kitchen will look.

Many home improvement stores will have kitchen designers on their staffs, and this is a resource you should take advantage of. They'll go over your plans with you and possibly have ideas you haven't considered.

When the time comes to place your order, make sure your measurements are very, very accurate or you will have a terrible time with your kitchen remodel. You can have professionals come out and do the measurements for you. In fact, if you are having your cabinets and countertops professionally installed, you WILL have professionals out taking measurements. If your measurements are accepted by the store without question and without sending out their own people, you will probably want to shop elsewhere. You're spending too much money on remodeling your kitchen to take that kind of chance.

Your cabinets will, of course, be installed before your new countertops. In fact, until your cabinets are installed, they can't even start work on your countertops if you have chosen granite or Silestone (or other stone) countertops because they need to make a template. Ask for temporary countertops and a sink to be installed so that you aren't eating out the entire time you're waiting for your countertops to be cut. It might take weeks.

Appliances such as stoves and refrigerators can be installed whenever convenient. As most dishwashers are installed beneath the countertops, you'll want to ask about the best time to replace your dishwasher.

Perhaps the most important aspect of planning your kitchen remodel. This is one of the most inconvenient rooms to remodel, so you'll want to do it at a time when you will have the time and patience to deal with it. Your kitchen will be marginally useable for weeks during the remodel. However, the beauty of your new kitchen should more than make up for the inconvenience.

Essential Tips to Build Outdoor Gazebos

A gazebo, simply stated, is a traditional aesthetic structure usually built in gardens, outer lawns or orchards.

History tells us that the concept of gazebos is several centuries old and in fact, ancient Rome had many summertime dwellings that resembled present-day gazebos. Despite its historicity, building a gazebo involves using a variety of materials and choosing from amongst different architectural styles.

As a first step, while designing an outdoor gazebo for your garden or outdoor, you must be clear in your mind why you are building a gazebo. This is necessary so that you can incorporate suitable landscaping ideas and also provide the required amenities. Usually, a gazebo is erected to provide people a place for rest and relaxation inside the garden. At times, gazebo is also built for anything else you wish to do – may be a bathing spot or an outdoor kitchen or a dining area.

Many place a large-sized table in their gazebos for dining purposes and/or other table-top activities. If you intend spending time in your outdoor gazebo during nights, it may be helpful to install some garden lamps to illumine the overall garden as well as the patios. For daytime use, particularly during summer months, you can provide the gazebo with a ceiling or pedestal fan.

You can even go to the extent of fitting an air conditioner or a heating system to overcome the varying temperatures of summers and winters. But to have all these facilities and use them, you must be mindful of the electricity and water that may be required.

When setting up the outdoor gazebo, you should identify the spot where you will construct the gazebo and find out the exact space measurements. Do not forget to check the soil to satisfy you can build a structure on it. If you are aesthetically minded, you should also complement your gazebo and landscaping ideas with the existing patio design.

It is good to know that most outdoor gazebos are hexagonal in shape. Of course, depending on your landscaping ideas and patio designs, your gazebo can even go up to eight sides and be octagonal in shape or settle for something quadrangular with just four sides. It is again a question of personal preference whether you want to construct your gazebo with wood or bricks or concrete or any other materials. Many experts suggest walling should have creative drawings to synchronize with your patio designs.

Last but not least in importance is the roof that is expected to lend majesty to the overall design of a gazebo. You can consider the top to be made into a bird house, a weathervane, or pagoda-top cupolas on it, or any such similarly exotic design. Any handyman will be able to build a simple and common type of gazebo for you, but if you are planning something expansive, ornate and fanciful then you will be best advised to requisition the services of a professional.

There are pre-fabricated gazebos kits available in the market and you can shop for them either online or offline and if you choose to buy any of these kits, you can do the assembling yourself with minimum tools and without much external help.
John peter who is an author interested in gardening and he wrote many articles related this topic. He recommends to visit cool-off.com site for reliable Outdoor Cabanas, Misting Nozzles and Market Umbrellas

About Author

John peter is an expert SEO copywriter for http://www.cool-off.com/. He has written many articles like misting systems, shade sails, pool cabana, home misting system, portable misting fan and more. For more information visit our site http://www.cool-off.com/. Contact me at cooloffarticle@gmail.com

Wednesday, April 13, 2011

Decorate Teenager's Room With Wall Art Stickers

When it comes to decorating rooms, the most difficult age group to decorate for has to be teenagers and 'tweens'. Their rooms are stuck between mummy and daddy decorating and their own need to surround themselves with decorating items that they find cool and entertaining.

The key is to find a balance. You can either focus on decorating the floor/ walls and lighting in neutral decorating themes and then let the teenager add their touch with soft furnishings and posters, ornaments etc. Or you could let them choose the base color scheme and you look at providing the detail.

Either way, presenting some ideas is key and letting the teenager choose or at least have some say in how it unfolds is important.

For your own sanity, as the parent, guardian, decorator, remain flexible and be prepared that the chosen decor won't last long. No doubt the theme and ideas will change every 12 months as the teenager grows and trends change.

With short term decorating in mind, we highly recommend the decorating base; walls, floors, curtains etc are relatively neutral which allows the lower cost changeable items to be updated frequently.

The low cost wall vinyl stickers available on the market today are a definite consideration when decorating a teenagers room. With dozens of online shops available in USA, Europe and Australia all offering amazing designs of wall stickers and wall lettering and quotes, you have plenty of choice.

Wall stickers are removable and low cost, two key considerations for decorating teenagers rooms. Hit some websites WITH your teenager, remember their input is essential for a happy decorating project.

Top 5 ideas for wall sticker designs for teenagers include:


Encourage your teenager to write a list of their favorite words that they would like on the wall. These words can be custom made into wall words in different fonts and colors.
Choose a meaningful quote, or together you can come up with a great quote and have that made into a wall quote.
Look for designs that reflect the teenagers interest, for example: dancing, sport, music, intellect, there are plenty of options.
For something really quirky you could have a custom wallpaper made with pictures and sketches by the teenager printed on the wallpaper. This is more of a long term project.
Pick out there favorite lines to a favorite song and use these as a wall quote.

Any wall stickers will decorate the walls, but also consider placing designs on bedroom windows and let the light shine through them, or on mirrored cupboards, on bedroom doors, in bathrooms. The decorating piece can be as large or as subtle as the teenager chooses.

Enjoy!


Article Source: http://EzineArticles.com/6107230

Building a Gazebo 101

Have you always wanted a gazebo in your backyard but were concerned you might not be able to build one yourself? Would you like the elegance and functionality that a gazebo would provide?

Even if you only consider yourself a basic handyperson, you can build a gazebo from scratch. Here are some ideas to get you started.

You have a few options when it comes to building your own gazebo.

Find gazebo plans free of charge online or in your local library. While this can be an inexpensive option, it will be more difficult for someone with little experience in building. With the gazebo plans, you will have to source all of the materials, cut all the pieces correctly and then assemble.

Purchase architectural blueprints. These blueprints will have more details, but they are usually for designs that are more complicated. Generally, unless you have a great deal of building experience, homeowners will contract out the assembly of this type of gazebo to contractor.

Purchase a gazebo kit. Gazebo kits are an excellent option for a homeowner willing to tackle building their own gazebo. Gazebo kits come with the prefabricated parts and screws for you to assemble. Typically, in a weekend, you can put together your gazebo with basic supplies like a screw gun, level and hammer.

Your gazebo can be placed anywhere on your yard. Some homeowners choose to bolt their gazebo to an existing wood floor or to a concrete slab. Most homeowners choose to build a gazebo with a built in floor. Since you will need to secure your gazebo with posts underground, be sure to call your local utility company to have them indicate if there are any underground pipes or cables you need to avoid.

Another decision you will have to make for your gazebo is the type of wood or other material to use. Your main choices are:

Pine – Although inexpensive and easy to work with, pine decomposes rather quickly so you will have to replace your gazebo sooner. Depending on your weather conditions, pine may not be your best choice.

Cedar – An excellent option for its beauty, cedar is also lightweight, dimensionally stable and naturally resistant to cupping, warping and splitting. Its biggest benefit is that cedar remains flat and straight and will stay beautiful for many years.

Redwood – Another good option, redwood is naturally decay and insect resistant so pressure treating isn’t required like it is with pine. Redwood can be quite expensive but it is beautiful and ages well.

Vinyl – If you have decided on a gazebo kit, they are available in vinyl. Vinyl is a good option because of its longevity and it is maintenance free because it doesn’t need to be weatherproofed or repainted.

Tips About How To Build Your Own Gazebo

When was the last time you thought about putting a gazebo in your yard? A gazebo brings relaxing days and nights while increasing the value of your property. Once you decide to build your own gazebo you will never regret it.

If you are the type that enjoys building things and are skilled with power tools you should build your own gazebo. It's easy to build your own gazebo once you have the right plans. Several sites on the Internet have free plans that will teach you have to do this. The plans take you step by step through the whole process complete with detailed instructions. You can get all the information you need to build your own gazebo by searching on the Internet.

Plans to build your own gazebo include showing you how to post the layout. Some plans differ in that some of the posts are cemented into the ground to anchor them securely while other plans show you how to bolt the posts onto a slab of concrete or wood floor. If you use a wood floor or concrete slab you eliminate the need for flooring. The best types of flooring for gazebos are wood, concrete, slate or tile.

The next step to build your own gazebo is mixing the cement and putting in the posts. Some people really enjoy mixing cement. And to save yourself some time you can get the kids involved mixing the cement. Just keep in mind that two people are needed to put in the posts. One person has to hold the post while the other shovels the wet cement into the hole.

It usually takes at least 24 hours for cement to dry and harden completely. After the cement is dry you need to trim the posts if they are longer than you need. Next is to place the head beams on the posts then hammer them together.

Your goal? To start utilizing these handy tips and build your own gazebo.

By:

Article Source: http://www.directorys.uniquearticles.info

Monday, April 11, 2011

How To Choose Quality Kitchen Cabinet Doors


When it comes to freshening up the way a room looks, you can oftentimes do minor changes with furniture to accomplish what you want to do. That's certainly true when it comes to kitchen cupboards. With kitchen cupboards, you often just need a touchup; in that case, you can often just get away with replacing the doors instead of the entire kitchen cabinet installation. Here are some things to think about when you replacing kitchen cupboard doors:

1. Instead of replacing the entire door, just replace "pieces"

Although it may be necessary to replace the entire door, it's not always true. For example, kitchen door handles, hardware, cupboard hinges, and so on can make the changes you want without doing a lot of work. It's also going to save you a lot of money, which is especially important if you are working with a small budget. It's not going to cost you a lot of money to replace kitchen cabinets' small parts, and it's also easy to find them. Quality replacement parts for your kitchen doors can usually be bought for much less than you'd pay if you buy the entire door.

2. Measure, measure, measure - and then measure again

If you are putting new doors on your kitchen cabinets, it's important to take accurate measurements first. Don't guess, but do carefully measure -- and doublecheck -- before you purchase the doors you want. This will help ensure that upon installation, your doors will fit perfectly. When you take measurements for your doors, make sure you add 2 inches. That's because replacement cupboard doors are usually an inch longer on either side as compared to the cabinets they're going to go on.

3. Do comparison shopping

Just as you should shop around to buy new kitchen cabinets, so you should take the same step when searching for replacement doors for your cabinet. You can find such doors in both online and offline stores. The more stores you compare prices in, the more likely you'll find a rock-bottom price. Do as much comparison shopping as you can, since you can ALWAYS find a better price.

4. Paint or stain yourself

This provides a few major benefits. The cost of the door will be lower if it lacks paint or stains. Also, you'll have control over the hue that the door has.

5. Choose your material

Replacement kitchen cabinet doors are available in a variety of materials, such as wood, metal, and glass. Wood is the most popular option, which actually provide several sub-options. For instance, you could choose genuine wood or manmade wood. And even if you choose natural wood, there are several varieties, including pine, oak, cherry, maple, and so on. Each type of wood creates a different look and feel, so it's crucial to consider the options carefully.

6. Simple, or fancy?

How do you want to update your kitchen? If you're simply going "basic and simple," your doors, too, are going to be basic and simple in that they won't be elaborate and will have smooth, simple surfaces. You can also choose more ornate doors, with intricate designs that are textured and "deep." When you choose a particular cabinet door and its design, make sure it's going to fit in with the overall design of your kitchen, so that it fits everything in that room.

Choosing the right replacement kitchen cabinet doors can open up new opportunities when remodeling your kitchen. As when selecting items such as kitchen table sets, the key is to choose the right one for your particular kitchen.

Saturday, April 9, 2011

Why Using A House Clearance Company When Your Moving Is A Good Idea

If you are ever thinking about relocating to another city there are a few things you need to think about and get sorted before you move from one home to another.

First thing you need to make sure you have the right transport for you belongings to be moved from one place to another. You may need to book a van and drivers but if you know someone who can drive or you can then why not just hire the van and drive it yourself saving you some money. Getting the stuff in the van can be a pain as you have to make sure it doesn't roll around inside as the van sways from side to side. Your pieces of furniture need to be protected specially if they are fragile, so appropriate padding needs to be put into place.

Once you have everything packed and ready to go you may want to do a sweep of the house to make sure you haven't left anything behind as you may not get a chance to return once you have left so have a good look and take your time. Of course if you have totally emptied the building then it would pretty obvious that you won't have left anything.

If you have plenty of things you don't want taking to your new home and isn't really of much use then you would want to get rid of these. If you have a junk room that hasn't seen the light of day for along time or a garden full of over grown weeds and garden rubbish, then you will have to get rid of it. Its not good manners to leave it for a new owner. You will have to arrange a way of getting rid of this rubbish and depending on how much stuff there is to move it could take time and be quite stressful. The most effective way to deal this issue is to get the professionals in. There are o many benefits from getting a professional house clearance company come in. They are effective, do it in half the time, have the know how to get rid of the waste properly and take the stress away from you.

Once you're on your way to your new home and new city most of the horrible work should be over, changing bank details, and such. The next big thing is to unpack and get your belongings into your new home. However if you have visited the place before and they previous owners have left a bit of junk then you may of needed the help of a house clearance company to get rid of it. Now all the hard work is done and dusted then its time to start making your home your own.


Article Source: http://EzineArticles.com/6147627

Thursday, April 7, 2011

Tropical Wall Decor - Bring the Islands Home


No matter what kind of day a person has had, walking into a room with tropical wall decor will most definitely make the person's day better. This is why decorating a room with a tropical twist is such a good idea. What makes it an even better idea is the cost at which this redecorating can be accomplished. With a simple search online, anyone can find the prices that are right for him or her.

Beginning with the walls, there are several options an individual can choose between to create the tropical feel of their dreams. For instance, with wall hangings, tapestries, and paintings, the mood and color scheme will be set creating a relaxing fall-asleep-on-the-beach feel or an energizing seize-the-day atmosphere. Each of these all decorations come in various sizes too, so every room can have one.

Many of these great wall decorations have themes of amazing island landscapes with silhouetted palm trees. Who can feel stressed with that kind of relaxation? There are also some decorations that create the sound of running water, giving the room a tropical river feel. Some of these also have tropical bird noises.

These wall decorations can either come in just one single painting or in three parts. The three-part paintings are normally one image broken into three parts. This creates a more modern artsy look, which can be very refined for those formal dinner parties. Guests will feel as though they just got off the plain and are now in the tropics with tropical decor!

Many people think that the boardwalk is the best place to shop for these sorts of decorations, but the boardwalk is usually overpriced. A simple search online will reveal a plethora of less-expensive options that individuals on which individuals should capitalize. The best part about shopping online is that individuals can do it in their own homes, so they can see if they think a decoration will look right.

Tropical decor does not have to be limited to wall paintings and hangings. Individuals can find online sculptures of tropical wildlife creatures and this will help to give the room the relaxation it deserves. These trinkets come in a wide variety of sizes, too, so this really opens the options for coffee tables and lamp tables.

Once the wall is painted and there are wall hangings or paintings of the tropical environment the designer wants, the lighting should be discussed. Lighting will help to work with the paint and decorations in making the right relaxation feel. The lighting could be aimed to represent sunset, sunrise, midday, or midnight.

People too often forget that they have the option of tropical decor when they go to redecorate a room. Bringing the tropics into the living room, bathroom, or guestroom will really accentuate feelings of relaxation. Put tropical wall decor on the list of things to do and then simply go online and compare prices. With barely any cost at all an individual can go home to a vacation scene.

Home Carpet Cleaners - How to Use a Steam Cleaner to Clean Your Carpets


Using home carpet cleaners can help keep you keep the carpet in your house looking new and clean. The process of using carpet cleaners is quite simple. Most cleaners use either steam or hot water to do this. Water goes through the machine and gets mixed with water. The water and detergent mixture is sprayed on the carpet and scrubbed in.

The cleaning solution will penetrate the carpet fibers all the way to the backing. The penetration and scrubbing will loosen up the soil, dirt, oil, grease, and other things that are trapped in the carpet fibers. This gets your carpet cleaner than it has probably ever been.

Some models of home carpet cleaners are mounted on the trucks. These are used by professional crews. They are designed to be used by only taking the spraying wand and the hose inside. The advantage of these kinds of cleaners is that they are very powerful. The motor they use to power the cleaners and vacuum. They can be powered by gas, propane, even the truck engine.

This method of cleaning is recommend by most carpet manufacturers and professional cleaners. This process is the best way to get your carpets sparkling clean. The problem with using professional cleaners is that they are expensive and you have to schedule them. These guys come out and clean your whole house. This is not a good way to go if you just need one room cleaned or if you just need a small stain to remove.

Luckily for us, there are smaller models available. The most common one is a Rug Doctor. These are the steam cleaners that are available for rent at the local pharmacy or grocery store. These smaller units are great when you only need to clean one room or just need to remove a small stain. There are also smaller models that you can buy. This is great because you will always have you cleaner available. You can quickly power it up to clean up any small spills.

One of the biggest challenges people are going to face when using home carpet cleaners is getting too much water on the ground. Getting too much water on the carpet can really increase the drying time. Just imagine how long it could take if water gets pooled up under the carpet. Of course, the only way to really avoid this problem is with experience. The old saying "practice makes perfect" comes to mind. After using a carpet cleaner a few times, you will get better at knowing how fast to go to avoid getting the floor too wet.

With that in mind, here are some steps that you need to take in order to get your carpets clean. These are the procedures you need to follow:


1.You need to make sure you have hot water, pre-rinse, and cleaning solution.
2.Move any furniture out of the way so you can clean easily.
3.Vacuum the carpet thoroughly. If you carpet is thick you might need to use a brush to loosen up the dirt.
4.Apply a good amount of pre-rinse on the carpet.
5.Using a grooming tool, work the spray into the carpet fibers and let it sit for about 10 minutes.
6.Use the carpet cleaner and go over the carpet applying the water and cleaning solution.
7.Go back over the carpet on the rinse cycle and vacuum out all the dirty water.
8.If needed repeat all the above steps until your carpet is clean.
9.Let the carpet dry and then replace all of your furniture.

Follow these steps and you will be able to enjoy really clean carpet for many years. These same steps apply if you rent or buy a home carpet cleaner. Purchasing a machine to clean your carpets will allow you to clean your carpets any time you like.


Article Source: http://EzineArticles.com/6146772

Thursday, March 24, 2011

Space Saving Furniture

One of the problems I find with some space saving furniture is that I have little room to actually put it. An example of this is the freestanding Elfa tower into which sliding baskets are intended to fit. This item has been designed for kitchen storage, supposedly great for storing vegetables or dry food. Each shelf is 60cm long, with four in the pack. Four side baskets have been added as well as a tea towel hook rack. The whole concept is great, but I have a tiny galley kitchen and, with my fully fitted cabinets, I don't even have sufficient room to place a waste bin, let alone this Elfa Tower - no matter how much of a good idea it is. It is also quite expensive, I think, for what it is. If you are changing your furniture it is OK to consider new concepts and modern designs - you might like them and they may work better for you than the traditional space saving furniture you have been utilizing up to now.

However, don't be swayed by too much encouragement from the sales' staff - they are generally paid a commission per sale. You need to make up your own mind and know what will and will not fit into your home. That is the reason I mentioned the Elfa tower not being suitable for my kitchen which is very contemporary but with absolutely no spare space. This brings me to the kitchen waste bin. As I mentioned, in my kitchen there really is no space for a floor standing bin so I have had to resort to an under-the-cabinet trash can. I say resort because, in a way, I resent having valuable cupboard space being wasted on a rubbish bin - I know it's not wasted but, to me, I feel it is! Something I do like, however, and which would look good in my dining room, is the space saving table which comes complete with hideaway chairs that have been designed to slot beneath the table when not in use.

This space saving table comes as a flat pack self-assembly item which is, I must say, reflected in its economical price tag. The table itself is made of black glass, with dimensions measuring 94cm long x 79 cm wide x 77cm high. The chairs feature a contemporary design made from black resin to match the contours of the table. I like this and, while it would be no use trying to fit this table and chairs into my kitchen, it would make a lovely piece of space saving furniture for my dining room and I would certainly think of buying it for myself. Another kind of dining table that is really useful if you are considering space saving furniture is the gate-leg table. This kind of table can be stored flat against a wall and, within seconds, pulled out and the drop-leaf extension flaps lifted and secured by the gate legs beneath the table's surface. These drop-leaf designs have been around for many years and, although they have evolved to take on a more contemporary design, space saving furniture such as this has stood the test of time and proved their efficacy.

Monday, November 1, 2010

Paint White Walls - Decorating Inspiration for the Many Uses of This Color

Painting white walls can be called boring or maybe contemporary, or actually trend setting. Having all white walls is loved by many people. They love the starkness of the color, the clean look, and the way it goes with anything. After all everything matches a white wall.

When choosing color we are often over whelmed with all the choices...it is no different when choosing this color. Do you realize that there are hundreds options. Some have deeper colors like brown or gray or green added, others have cooler colors added like blues.

One great use of using white walls is when displaying artwork; you never see art galleries with any other color. That is because they want the artwork to stand out not the walls. It is very effective so if you have a lot of beautiful artwork this is the color to use so that your art makes the statement.

The most effective use of choosing the color white is to go all white, and use different textures for interest in the room. Example use a different textured for the curtains, another different texture for throw pillows. This can all be pulled together with your large pieces of furniture like couches and chairs make sure they have an all white or all neutral look and feel.

Something that can give white painted walls a different look is the sheen you use for the paint. A flat paint will not bounce color around; it will just absorb the color. While a paint with a shinier sheen will help the light bounce around the room. Don't be afraid to even create an accent wall with one wall using an extremely shinny sheen and the other walls having a duller sheen.

It is a lot of fun to create illusions with this color. When you use a slightly darker or lighter hue of it and paint either a stripe, or stencil, or even just sponge it on the wall, it gives a new subtle depth and interest. Remember you are just looking for the illusion of another color or design, nothing overwhelming so keep the colors very close together. Always practice before you start on a wall, and live with the sample through a couple days of light changes in the room. This gives you a good way it see how it will look when you are done with the entire room.

Before you start any interior design project like painting, be sure you have done your home work. Take pictures of inspirational places and use picture from magazines to give you a better understanding of how the colors you want will look together.

Sunday, October 31, 2010

Color Inspiration - Choosing Interior Paint Colors by Looking At the World Around You

Choosing color for your home can be fun and easy, when you approach it in a new way. What if you carried a camera with you everywhere you went and took pictures of colors you saw that you liked? Maybe it is the paint colors in a large opulent hotel, perhaps a friend's house. Don't forget the best of all canvases Mother Earth, the richness of color is everywhere in nature. When you purposely start looking it might amaze you what you have been missing.

Watch to see how various places use paint to create different feelings and emotions depending on what they want you to feel or how they want you to act. Great place for this is restaurants, check out the paint colors they use and ask yourself why their choices? See if there is a theme in the colors your favorite restaurants use. Remember they say red makes you hungry... do you think it is true?

If you have a very active play room, go to places that also want you do to high energy things, take pictures of the colors they use in their paint choices. Likewise if you want a very healing quite space, a great place is a hospital, I kid you not, check out the healing colors they use, it might surprise you. In Colorado they use a lot of deep light hues of purple.

Do these activities for several days then compare the pictures and see what they say about you and how you choose paint color. Are they all warm, deep intense or are they lighter more beach hues. Do you see a pattern? If you find a pattern you can use it throughout your entire house. If not that's ok, you choose your favorite and use some of the other colors as accent. When you have made your final choice blow up the pictures so you can have the colors matched, any color can be created at your paint stores or large hardware stores.

Also use some of the photos you have taken and blow up for artwork throughout your home, you may have some masterpieces. Don't be afraid to crop the pictures in different places to create more interesting subject matter. Get a matching mat and you have a wonderful addition to your home.

There is rarely any place I go that I do not see how paint color is used, and yes I always have a camera and take a lot of pictures. It is in my blood and I love it. I am not the norm and that's ok someone has to do it and I always hope to recruit some other newbies. I love color and the way it changes emotions, feelings and actions.

Saturday, October 30, 2010

Tips For Using Acrylic Paints

Acrylic paints are very useful for painting the weekend crafts that you and your kids create in your wood shop over the weekends. In dealing with acrylic paints, here are some tips to help you get the most out of your experience in dealing with them.

The nice thing about acrylic paints is that, unlike ones that are oil based, they are fast drying. This means that you can cover your bird house, knick knack, or other craft in the morning and by afternoon it is dry and ready to be used. Of course, since the acrylic is fast drying, it means that you should work with it quickly. Once you open the tube, work with it as quickly as you can to avoid having it dry out before you can cover your target piece.

Acrylic products are among the most versatile of paints in that they can mimic the other two major styles of coverings - water and oil based. For example, by diluting it with water or other substances, you can give the color a slightly washed out look that closely resembles water color. By adding acrylic gel or media, you can mimic the look of an oil painting.

Those who are tight on funds and have never used acrylic products before, may want to start with a lower grade product. Some manufacturers sell what is known as student grade acrylic coatings. These products have a lower pigment concentration and a few other differences that make them less expensive and more affordable for those who can't quite afford the premium paints. And then, as you become more comfortable using acrylics, you can make a seamless transition to the more expensive grades.

If the acrylic container has been previously opened, you may find that some of the moisture has evaporated making the paint thick and hard to handle. In this case you need to thin it out. The easiest way to do this is by adding plain water to it. When the covering dries, it will still provide a water resistant layer to the piece you have painted.

A part of acrylic paint maintenance is caring for the paints that you use. When you are finished painting, clean the caps on your acrylic paint tubes. Clean threads as well. If you don't, you may find it difficult or impossible to reopen it the next time that you are ready to use it.
Article source : EzineArticles